Gallery Tutorial
*Note this is for an older version of Gallery.
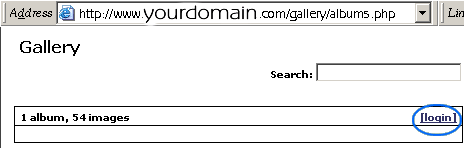
- Start by typing www.yourdomain.com/gallery/albums.php in the address bar of your browser.
- Click login (at the upper right of the page) and enter your login information.
- Next, select the album you want to edit or add images to by clicking on the image that represents that album, or the title of the album.
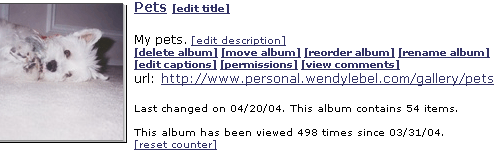
- Once in the album, you can choose what you want to do by clicking the links near the upper right. Click Add Photos to add pictures to your gallery.

- This window will pop up (you may need to make sure you don't have popups blocked first).
- To upload a certain number of images, you can select a number from the dropdown box. If you are adding 5 or less, you can ignore it.
- Click the Browse button next to the first file textbox. Search on your computer for the image you want to upload to your gallery.
- Type a Caption if you want, but you can wait on it (next step).
- Click Upload Now.

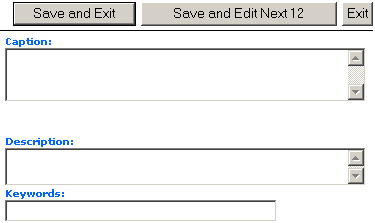
- Back on this screen, click Captions.
- You should see a list of the images and boxes for captions, descriptions, and keywords to help visitors find images on your site.
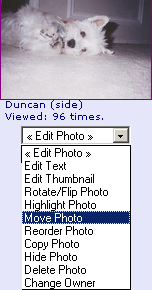
- If you just want to change an individual photo, select the dropdown under it and choose the option you want.
- Edit text allows you to edit the caption, etc. for that photo.
- Highlight photo makes that the photo that represents the album.
- Hide makes the picture visible only to people who are logged in.
|
