The images in this
tutorial have been cropped for speed...
|

|
|
|
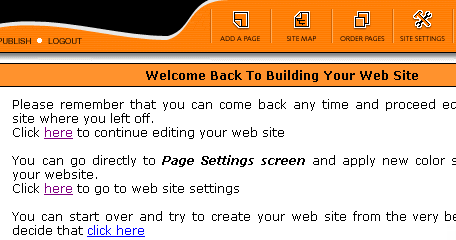
Click the part that says, "Click here to continue editing your web
site."
|
|
This is the top menu. From it, you can add a
page, check out the site map, put your pages
in order, and change the site settings.

|
|
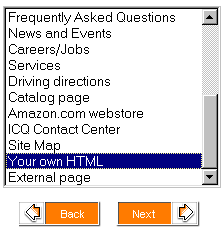
When adding a page, I usually use "Your Own HTML" as a
template. It is easier to customize it...
"Catalog page" is great for photo albums.
|
|
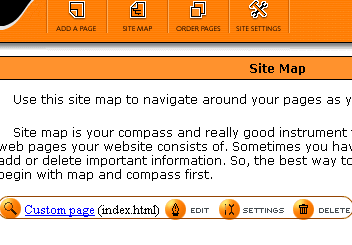
The site map button (top of the screen) will allow you to see a list of
all your pages and you can then click the magnifying glass to view it, Edit
to edit, Settings to change page settings, or delete to get rid of it.
|
|
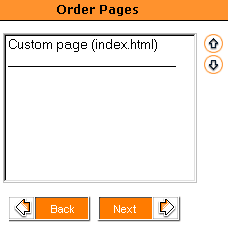
Select (in the list box) the page you want to move, then click the up or
down arrows until it is where you want it.
|
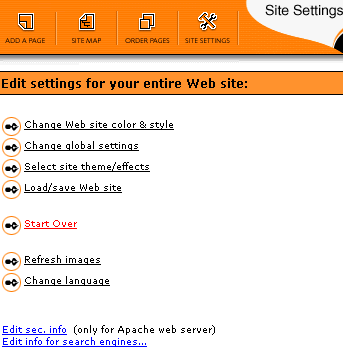
- This allows you to change the theme (not recommended if you already
have everything such as wallpaper, colors, etc. customized!). If
you are just starting to create one, I took screenshots
of the templates which may make it easier to choose.
- Change Global Settings
- Site theme/effects - these are nice, but may slow down your pages.
- Load/save your site - important!
Don't forget to save your work before logging out! I've made it a
habit to save, then publish.
- Start Over - not recommended!
- Refresh images & Change Language - mostly just ignore these...
|
|
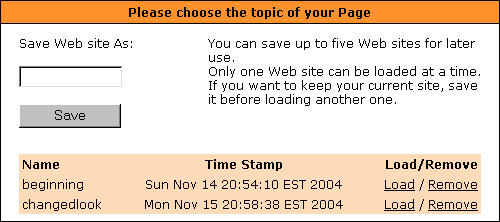
Type a name to save your work as - you can type the same name if you want
to overwrite one.
Always save your work before logging out! You don't have to publish
it right away...
|
|
The view tab shows you what your page will look like.

|
|
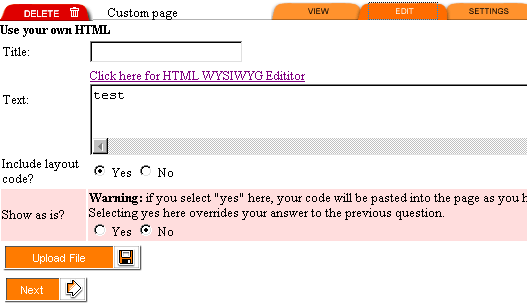
The edit tab is where you enter your page content. See Editor
description.
|

|
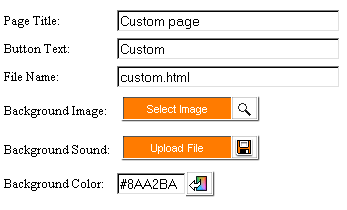 Page title - once published, this will be seen at the top of your
browser. (This page is titled "WendyLeBel.com -
Web Consulting, Design, Graphics, Flash, Tutorials - Web Builder General
Tutorial".) It's a good idea to title things with
descriptions and keywords in them (for search engines).
Button text - this is what will appear on
your navigation bar. Depending on which template you use, you may have
to keep it short.
File name - use something like "contact_us"
- leave out the .html part and only use lowercase letters and no punctuation
other than _ (underscore) and - (dash).
Background Image - not recommended to
change. Background images must be a very small file size and easily
tiled. Also, it is best to keep the same background image on all pages
in your site (for consistency).
Background Sound - not recommended - this
usually will slow down your page...
Background Color - if you have wallpaper
chosen, this will rarely be seen.
|
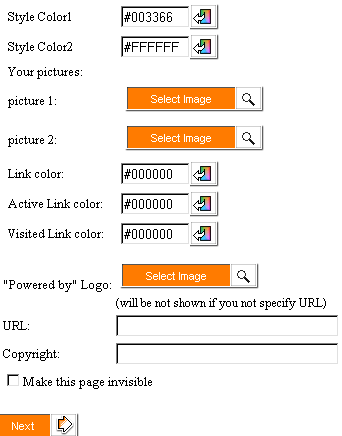 Style
Color - if you use the wallpaper that comes with the theme, you can
change the style color. Style
Color - if you use the wallpaper that comes with the theme, you can
change the style color.
Your pictures - some templates have this
option (though I think most don't).
Link color - color of links - changing this
in some templates will cause your navigation text to change, too. If
this is the case, you can leave this as is and change the link colors in
your site manually.
Active Link color - ignore...
Visited Link color - when someone has been
to that page already, you can have it show up in a different color.
"Powered by Logo" - ignore
URL - ignore
Copyright - If you don't put something there
for every page, it will put a link to your hosting company on it.
Make this page invisible - ignore
Next - click this button when your changes
are complete.
|
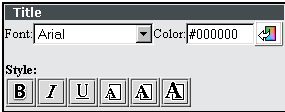 There
are usually 3 of these on the settings tab - Title, Text and Heading.
Doesn't seem to change much, though. If you specify the font in the
page itself, it may not change it... There
are usually 3 of these on the settings tab - Title, Text and Heading.
Doesn't seem to change much, though. If you specify the font in the
page itself, it may not change it...
|
Editor (HTML/Rich text)
This may be called WYSIWYG HTML editor - that stands for What You See Is
What You Get.
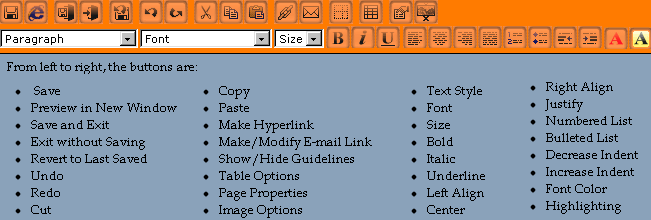
Always save the page after you've edited it (if you want to keep your
changes)!
This is a lot like using Microsoft Word.
|
|
|
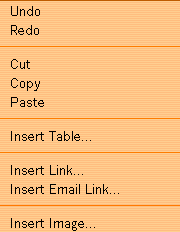
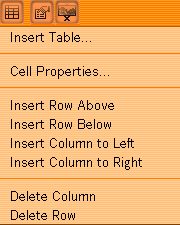
Clicking the Insert Table button in the Editor
brings up this menu. Start by clicking Insert Table.
Tables are very helpful for making things appear where you want them to.
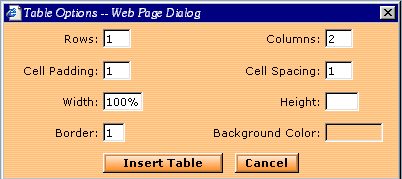
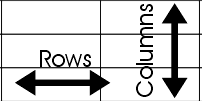
Usually, it is a good idea to put the width at 100% - this means it will
shrink itself if a visitor's screen resolution is smaller (so they don't
have to scroll over).
Border - typically, when using Web Builder, I put the border at 1 until
I'm done editing.
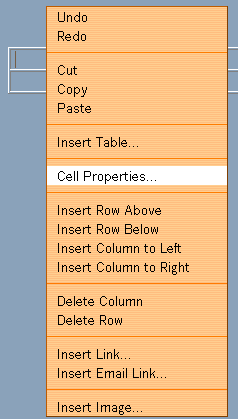
Cell Properties
Once you have a table inserted, you can change the cell properties
individually if you'd like to.
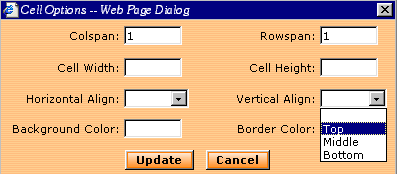
Cell Options - usually I change the vertical alignment to Top.
To select a table, hold your mouse over its borders until your mouse
looks kind of like this:

|
|
Remember not to have images that are too large - they will break the
program!!!
*If you are using the catalog template for an image gallery, here is
another tutorial
for it.
Uploading means sending data from your computer to another.
Downloading is receiving data.
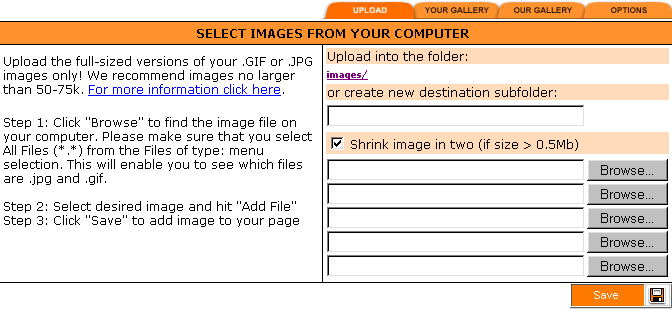
When you click the Image Options button in the Editor
or Select Image button from some of the other screens, this window pops
up.
You can (and should) put images into folders - too many images in a
folder will also cause problems in the program. To do this, you can
specify an existing or new folder by typing it in the "or create new
destination subfolder" box.
Click the Browse button(s) to select pictures from your computer to
send to the server.
If you already have images uploaded, you can select the "Your
Gallery" tab. Click the small image (thumbnail) to insert that
picture.

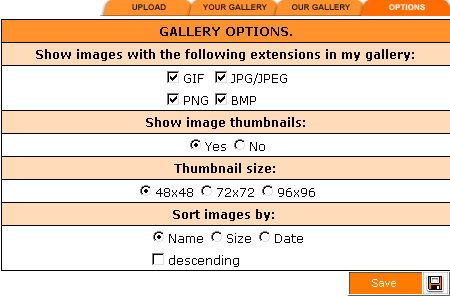
The Options tab allows you to customize your image gallery. If it
seems to be taking too long to view all the thumbnails, you can select the
"No" option under "Show image thumbnails". Click
Save to save your options.
|
|
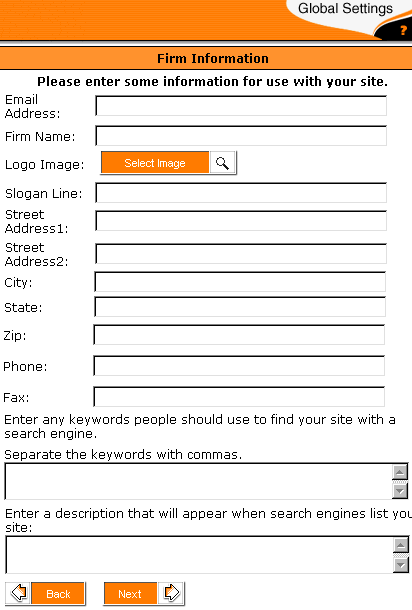
This is an important
section as far as search engines go...
If you enter an e-mail
address, it will put it as a button on your navigation bar.
Firm Name and Slogan
Line will show up (at least in most templates) somewhere as a
picture. You may have to keep the text short, depending on the
template.
Address information is
not required...
The keywords are
important! If someone is looking for your site or one like yours,
it's these keywords that get you found. To make sure that you have
good keywords, AbleTeam provides a service where they will research
keywords, give you the meta tags, etc. and submit your site to the search
engines... If you decide to submit your site yourself, you may still
not be found (like my site!).
Description is
what people see under your link:

|

![]()
![]()


